If you’ve dreamed of slicing into a golden, crackly loaf fresh from your own oven, this guide is for you. With simple ingredients, good technique, and a bit of patience, homemade bread is easier and more rewarding than it seems. Let’s break it down, step by step.
Start with good-quality flour
When baking homemade bread, choosing the right flour is key. Type 650 flour is a great option. This is a less refined, slightly darker flour, ideal for leavened doughs like bread, focaccia, rolls, or donuts. It has a higher mineral content and enough gluten to support a good rise and structure.
For cozonac (a traditional Romanian sweet bread, often filled with nuts, cocoa, or raisins) a different flour is more suitable: type 000 flour. It’s an extra-refined, fine flour with a high gluten content, perfect for soft, elastic doughs that rise well and hold their shape.
Sift the flour
Sifting flour might seem old-fashioned, but when it comes to homemade bread, it’s a step that makes a real difference. It helps break up any lumps, aerates the flour, and ensures a light, even texture in the dough.
If the flour has been sitting for a while, sifting also prevents using packed, overly dense flour that could throw off the recipe. This simple step makes kneading easier and helps the dough rise more evenly, leading to fluffier, better bread. So even if it’s not always needed in everyday baking, for bread, sifting is definitely worth the extra minute.
Preparing the starter (maia)
Here’s where the magic quietly begins. Place the sifted flour into a large bowl — light, airy, and ready for transformation.
If you’re using dry instant yeast, here’s a little trick: mix it straight into the flour with 2 teaspoons of sugar. No need to dissolve it — once warm water hits, it knows exactly what to do.
But if you’re using fresh yeast, there’s a special ritual. Rub it with sugar until it melts into a smooth, creamy paste, like sour cream. Add 50 ml of warm water and a spoonful of flour, stir gently, and let it rest somewhere warm. In just 10–15 minutes, it will bubble up and double in volume — a quiet sign that your dough is ready to be born.
Now, all that’s left is to slowly work in the rest of the warm water, salt, and oil. From here, the dough starts to come alive.
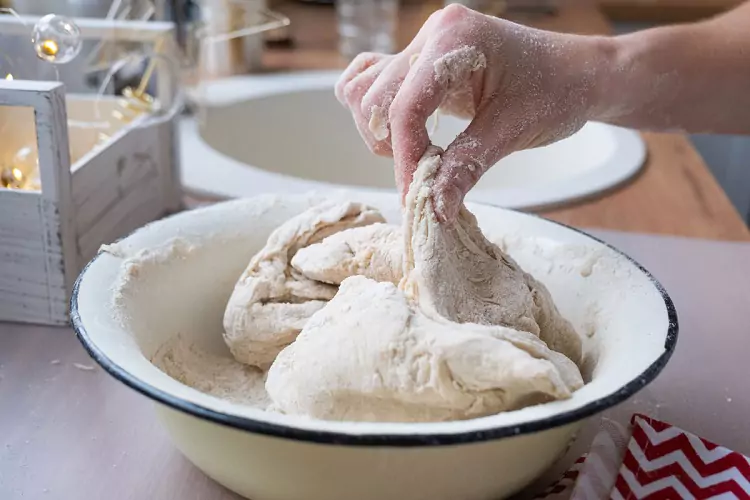
Mix and knead the dough
One of the real secrets to great homemade bread isn’t just in the ingredients. I’s in how you treat the dough. Once water, salt, and oil are mixed in, kneading brings it to life.
Oiling your hands and folding the dough inward helps trap air, which makes the bread rise beautifully. Then comes the traditional trick: slap the dough into the bowl several times. It may look odd, but it spreads air evenly, making the dough smoother, more elastic, and easier to handle.
If it’s still sticky, add a touch of flour and knead a bit more. Once soft and springy, let it rest. That’s when the magic really starts.
Let the dough rise
Place the dough back in the bowl, smooth out the top, and cover it. Keep it somewhere warm and draft-free. A good rule of thumb: your dough should triple in size before moving to the next step. This usually takes 1 to 2 hours.
Bake it right
Great bread needs more than just heat. It needs the right heat at the right time. Start baking at 160°C for 10 minutes to help the dough rise gently and avoid cracks. Then increase to 180°C and bake for another 30–50 minutes, until golden and hollow-sounding when tapped.
Once out of the oven, take the bread out of the pan and brush it with water (or sweetened water) for a soft, shiny crust. Then, let it cool on a rack – that’s the secret to keeping the crust tender, not tough.
Bonus: Add-ins for variety
Want your bread to stay soft for longer? A traditional trick is to add mashed potatoes or even a bit of cooked, soft malai (polenta) into the dough. This not only stretches your flour further but also keeps the crumb moist for days.
That’s all you need: 1 kg of flour, 10 g dry yeast (or 25 g fresh yeast), 2 teaspoons of salt, 2 teaspoons of sugar, 50 ml of oil, and 650 ml of warm water. Simple ingredients, no fancy tools, just your hands, a warm kitchen, and a bit of patience.
Don’t worry if it’s not perfect the first time. Bread has a way of teaching you as you go. So roll up your sleeves, trust the process, and enjoy the magic of turning a few humble ingredients into something warm, fluffy, and made with love. You’ve got this!