If you’re looking for a way to make your GIS maps more visually appealing and easier to interpret, hillshade Lapak GIS might just be the solution you need. In this article, we’ll explain what hillshade is, how it works, and how you can use it to enhance the visual appeal of your maps.
What is Hillshade?
Hillshade is a technique used in GIS to create a shaded relief map of a terrain, making it look more three-dimensional and realistic. This technique simulates the effect of sunlight on the terrain, creating shadows and highlights that can give the terrain a more natural and visually appealing look. Hillshade can be created using digital elevation models (DEM) of the terrain.
How does Hillshade work?
Hillshade works by simulating the angle of the sun’s rays and how they would interact with the terrain at each point on the map. This is done by calculating the slope and aspect of each point on the map, and then simulating the angle of the sun’s rays based on the position of the sun relative to the terrain.
The hillshade technique then applies a shading algorithm to the map, which uses the angle of the sun’s rays to create shadows and highlights on the terrain, giving it a more three-dimensional look.
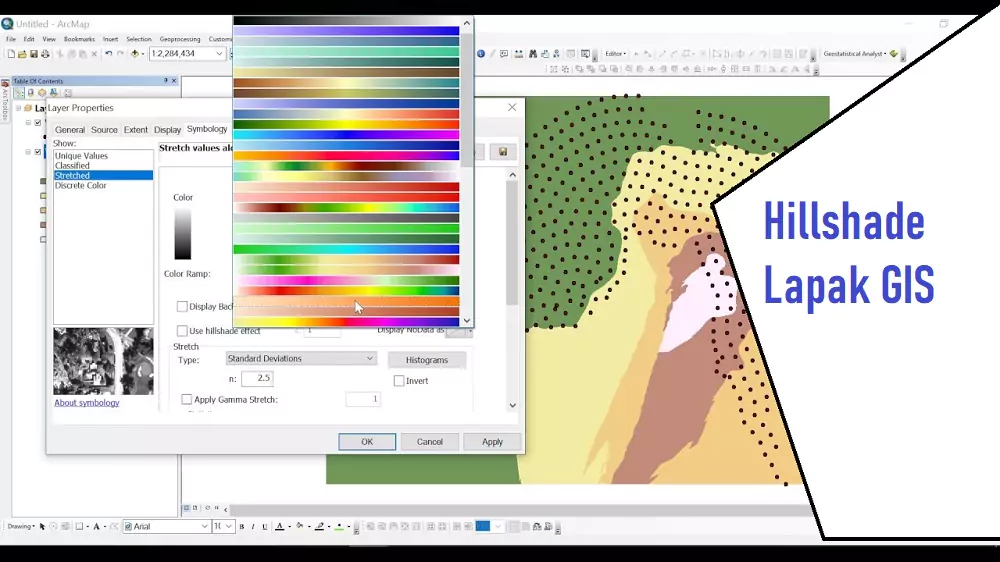
How to create Hillshade in Lapak GIS?
Creating hillshade in Lapak GIS is a simple process. Lapak GIS is an open-source GIS software that provides a hillshade tool, making it easy for users to create hillshade maps.
To create hillshade in Lapak GIS, follow these simple steps:
- Load the DEM into Lapak GIS
- Click on the Hillshade tool from the toolbar
- Adjust the parameters of the hillshade tool, such as the azimuth and altitude of the sun, until you achieve the desired effect.
- Save the hillshade map as a new layer.
Once you have created a hillshade map, you can overlay other data layers on top of it, such as roads, rivers, or other features. This will make the map more visually appealing and easier to interpret.
Advantages of Hillshade
Hillshade maps have several advantages over traditional flat maps.
Improved visualization
Hillshade maps give the terrain a more three-dimensional look, making it easier to visualize and interpret. This can be especially useful for outdoor enthusiasts or hikers who need to navigate through unfamiliar terrain.
Enhanced aesthetics
Hillshade maps are visually appealing, making them suitable for use in marketing materials or presentations.
Improved cartographic representation
Hillshade maps provide a better representation of the terrain, making it easier to identify patterns and relationships that may not be visible on traditional flat maps.
Tips for Using Hillshade Effectively
To get the most out of hillshade maps, here are a few tips to keep in mind:
Choose the right sun angle
Choosing the right sun angle is critical to creating an effective hillshade map. Adjust the azimuth and altitude of the sun until you achieve the desired effect.
Don’t overdo it
Hillshade maps should be used in moderation. Overuse can make the map look too cluttered and may make it difficult to read.
Combine with other layers
Hillshade maps are most effective when combined with other layers, such as roads, rivers, or other features. This will help to provide context and make the map easier to interpret.
Conclusion
Hillshade is a simple but effective technique for creating visually appealing and easy-to-interpret maps. By simulating the effect of sunlight on the terrain, hillshade maps can provide a more realistic and three-dimensional look to your GIS maps. Lapak GIS provides a simple and user-friendly tool to create hillshade maps, making it accessible to GIS users of all levels.
When using hillshade, it’s important to choose the right sun angle, not to overdo it, and to combine it with other layers to provide context and make the map easier to interpret. By following these tips, you can create hillshade maps that enhance the visual appeal and cartographic representation of your GIS maps.